Formatting a Hard Drive
Jump to navigation
Jump to search
Hard drives on the C256 Foenix are formatted using the FAT32 file system, but there are a couple of restrictions currently:
- Only partition 0 is supported.
- A partition can have at most 2GB of space.
- The disk must be formatted with allocation blocks of 512 bytes.
- The partition must be formatted using the FAT32 LBA format, which has a code of $0C.
How to Format the Drive
These instructions are written based on Windows 10, but should work similarly in other recent versions of Windows.
- Open the Drive Management tool (right click "This PC", choose "Manage", select "Disk Management" from the "Storage" option).
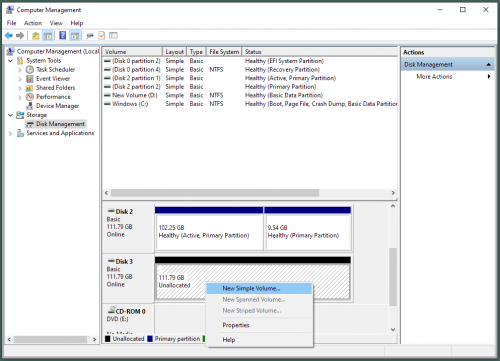
- Right click on the drive to format and select "New Simple Volume".
- Enter a size for the new volume.
IMPORTANT: Currently, this number must be no greater than 2048.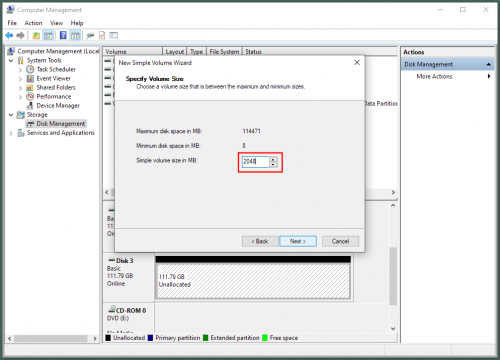
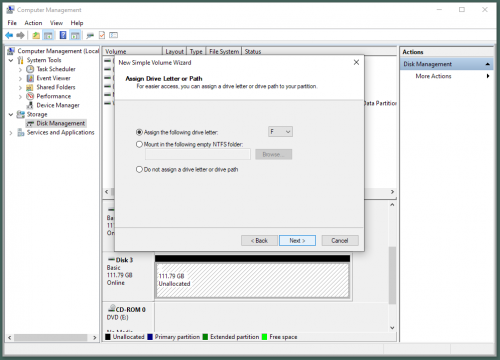
- Select a drive letter for mounting to your PC. This value does not matter since you will be removing the drive before putting it on your FMX, but you can use the mounted volume to copy files.
- Select to format the drive, and select the file system and allocation size. Quick format is sufficient.
IMPORTANT: Currently, the file system must be "FAT32", and the allocation unit size must be "512". No other values will work!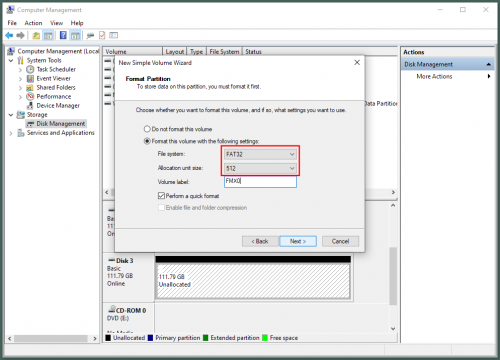
- Click through to complete the wizard and let it finish the partition and formatting.
At this point, the drive should be available on your desktop. You can copy files to it to use on your FMX. Keep in mind that directories and long file names are not currently supported, so you're restricted to the root directory and 8.3 file names. When you are ready, you can unmount the drive from your PC and install it on your FMX. It should work as follows:
